Image Preview
1 / 1
HomeLearnCustomise Dataverse Rich Text Editor: Add Custom Fonts, Colors, and Formatting Options
🔥 AdvancedDataverseModel-Driven Apps10 min readMarch 2026

Customise Dataverse Rich Text Editor: Add Custom Fonts, Colors, and Formatting Options

Learn how to customise the rich text editor in Dataverse model-driven apps by adding custom fonts, colours, and formatting options through JSON configuration. This guide covers understanding the default editor configuration, creating custom JSON settings files, modifying toolbar options, adding custom colour palettes, and deploying enhanced rich text editing capabilities across your model-driven apps.

RL
Rob Lees
Founder & Principal Consultant
Share

Overview

The Dataverse rich text editor control supports extensive customisation through JSON configuration files that define toolbar buttons, font families, colour palettes, and formatting options. By creating custom configuration files and applying them to rich text columns in model-driven apps, you can provide users with organisation-specific fonts, brand colours, and tailored formatting tools that align with corporate style guides and content standards.

Prerequisites

  • Advanced model-driven app customisation experience
  • Understanding of JSON structure and syntax
  • Familiarity with model-driven app form editing
  • Knowledge of web resources in Dataverse solutions

Why Customise the Rich Text Editor?

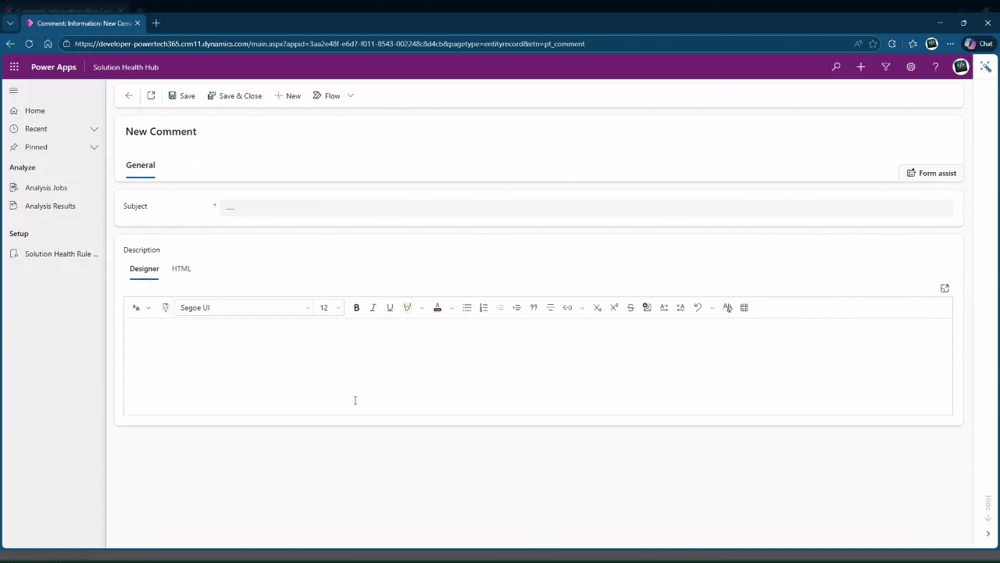
The Dataverse rich text editor is a versatile tool for creating and editing formatted text in model-driven apps. By default, it comes with a standard set of fonts, colours, and formatting options suitable for general use. However, many organisations require specific customisation to align with brand guidelines, regulatory requirements, or specific use cases.

Common customisation scenarios:

  • Adding corporate brand fonts that match company style guides
  • Restricting colour palette to brand-approved colours only
  • Removing formatting options to enforce content consistency
  • Adding custom toolbar buttons for organisation-specific needs
  • Enabling accessibility features for compliance requirements
  • Controlling HTML output to prevent security issues

What you can customise:

  • Font families – Add custom fonts, remove unwanted fonts, set default font
  • Colour palettes – Define specific colours for text and backgrounds
  • Toolbar buttons – Show/hide formatting tools, reorder button layout
  • Font sizes – Set available size options, define minimum/maximum sizes
  • Plugins – Enable/disable editor features like tables, lists, code blocks
Default rich text editor with standard configuration
💡 Key Concept

Rich text editor customisation works through JSON configuration files uploaded as web resources to Dataverse. These configuration files define which fonts, colours, and toolbar buttons appear in the editor. By applying a custom configuration to specific rich text columns, you can provide different editing experiences for different fields while maintaining consistent branding across your organisation.

Benefits of Custom Editor Configuration

Organisations customise the rich text editor for several compelling reasons beyond simple brand alignment. Understanding these benefits helps justify the investment in creating and maintaining custom configurations.

Brand consistency and corporate identity:

  • Enforce use of approved brand fonts across all formatted content
  • Restrict colour selection to corporate colour palette
  • Ensure marketing materials match brand guidelines automatically
  • Prevent users from introducing off-brand styling
Rich text editor customised with brand fonts and colours

User experience improvements:

  • Simplify toolbar by removing unused formatting options
  • Group related tools together for easier discovery
  • Add keyboard shortcuts for frequently used formatting
  • Provide visual feedback through custom button icons

Content quality and governance:

  • Limit formatting options to maintain consistent document structure
  • Prevent excessive styling that reduces readability
  • Enforce accessibility standards through controlled formatting
  • Standardise output HTML for downstream processing

Security and compliance:

  • Remove code editing capabilities to prevent injection attacks
  • Disable external image embedding for data security
  • Control HTML tags allowed in output
  • Meet regulatory requirements for content formatting

Industry-specific requirements:

  • Healthcare: HIPAA-compliant content formatting and storage
  • Legal: Document formatting standards for court submissions
  • Education: Accessibility requirements for learning materials
  • Finance: Regulatory disclosure formatting requirements
⚠️ Maintenance Consideration

Custom editor configurations require ongoing maintenance as Microsoft updates the rich text control. New editor versions may introduce breaking changes or new features that require configuration updates. Plan for quarterly reviews of custom configurations to ensure compatibility with platform updates and incorporate new capabilities that benefit users.

Choosing Configuration Approach

Microsoft provides two primary methods for customising the rich text editor: JSON configuration files and PowerApps Component Framework (PCF) controls. Understanding when to use each approach helps you choose the most maintainable solution.

JSON Configuration (Recommended for most scenarios):

  • No code development required—pure configuration approach
  • Faster implementation—hours instead of days
  • Easier maintenance—update JSON file without recompiling code
  • Lower technical skill requirement—no TypeScript/React knowledge needed
  • Better supported—follows Microsoft recommended practices

When JSON configuration is sufficient:

  • Adding or removing fonts from dropdown list
  • Customising colour palettes for text and backgrounds
  • Showing/hiding toolbar buttons and formatting options
  • Changing default font sizes and styles
  • Enabling/disabling editor plugins

PCF Custom Control (Required for advanced scenarios):

  • Full control over editor behaviour and rendering
  • Custom toolbar buttons with complex logic
  • Integration with external APIs or services
  • Completely custom formatting capabilities
  • Advanced validation or content transformation

When PCF is necessary:

  • Custom toolbar button that calls external API
  • Real-time content validation against business rules
  • Integration with third-party spell check services
  • Custom content templates loaded from Dataverse
  • Advanced image processing or manipulation

Decision framework:

Requirement JSON Config PCF Control
Add corporate fonts ✓ Yes Not needed
Custom colour palette ✓ Yes Not needed
Remove formatting options ✓ Yes Not needed
Custom validation logic Limited ✓ Required
External API integration No ✓ Required
Custom toolbar buttons with logic No ✓ Required
💡 Pro Tip

Start with JSON configuration even if you think you might need PCF later. JSON configs are quick to implement and let you validate user requirements before investing in custom code. Many organisations discover that JSON configuration meets 90% of their needs, making PCF development unnecessary. You can always upgrade to PCF later if requirements evolve.

Anatomy of a Configuration File

The rich text editor configuration is defined in a JSON file with specific structure and properties that control editor behaviour. Understanding this structure is essential for creating effective customisations.

Basic configuration file structure:

{
  "defaultSupportedProps": {
    "font_names": "Arial;Calibri;Verdana;Custom Font",
    "font_size": "8pt 10pt 12pt 14pt 18pt 24pt 36pt",
    "color_cols": "5",
    "color_rows": "4",
    "color_map": [
      "000000", "Black",
      "FFFFFF", "White",
      "0078D4", "Brand Blue"
    ]
  },
  "extraPlugins": "font,colorbutton",
  "removePlugins": "iframe,flash",
  "toolbar": [
    {
      "name": "basicstyles",
      "items": ["Bold", "Italic", "Underline"]
    },
    {
      "name": "paragraph",
      "items": ["NumberedList", "BulletedList"]
    }
  ]
}

Key configuration sections explained:

Property Purpose Example Value
defaultSupportedProps Core editor settings Fonts, colours, sizes
font_names Available font list Arial;Calibri;Verdana
color_map Custom colour palette Hex codes with labels
toolbar Button layout and grouping Array of toolbar groups
extraPlugins Additional features to enable font,colorbutton,table
removePlugins Features to disable iframe,flash,forms

Common configuration properties:

Font Configuration:
font_names: Semicolon-separated list of font families
font_size: Space-separated list of sizes with units
font_defaultLabel: Default font shown in dropdown

Colour Configuration:
color_cols: Number of colour picker columns
color_rows: Number of colour picker rows
color_map: Array of hex codes and labels (pairs)

Toolbar Configuration:
toolbar: Array of toolbar groups with items
removeButtons: Comma-separated list of buttons to hide

Plugin Configuration:
extraPlugins: Enable additional features
removePlugins: Disable unwanted features
⚠️ JSON Syntax Critical

JSON syntax errors prevent the configuration from loading, resulting in the default editor appearing instead. Common mistakes: missing commas between properties, trailing commas after last item, unescaped quotes in strings, incorrect bracket matching. Always validate JSON syntax using online validators before uploading to Dataverse. One syntax error breaks the entire configuration.

Implementing Custom Configuration

Step 1: Create the JSON configuration file

1
Create new text file named RTEConfig.json

Use a code editor like VS Code or Notepad++ for proper syntax highlighting.

2
Add your custom configuration JSON

Start with minimal config, test, then add more customisations incrementally.

3
Validate JSON syntax

Use jsonlint.com or VS Code validation to check for errors.

Step 2: Upload as web resource

Uploading JSON config as web resource in solution
1
Navigate to make.powerapps.com

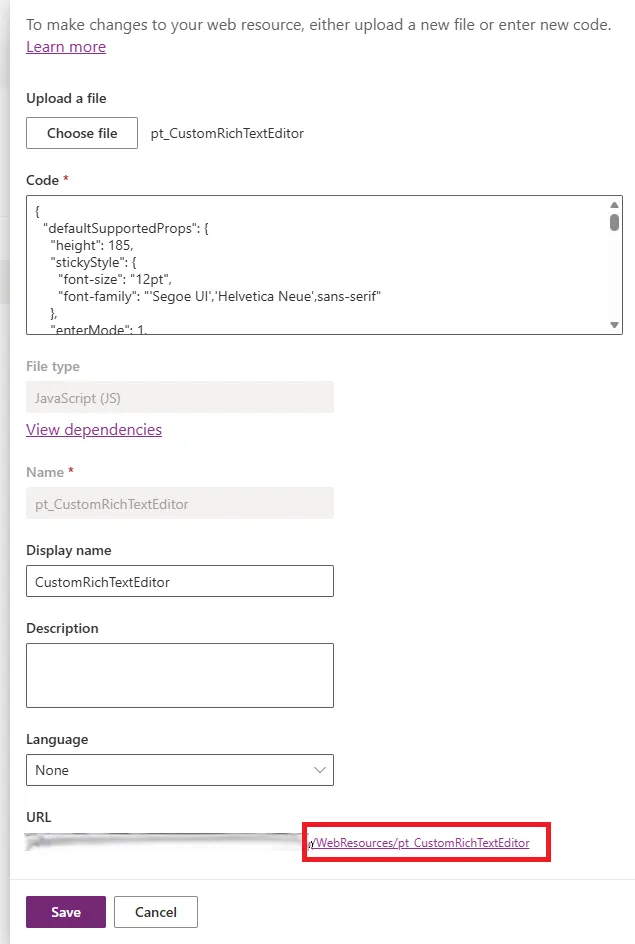
Select your solution, go to Web resources section.

2
Click New web resource

Name: prefix_RTEConfig, Type: JSON, Upload your file.

3
Save and publish

Publish all customisations to make web resource available.

Step 3: Apply to rich text field

1
Open form editor for your table

Select the form containing the rich text field to customise.

2
Select the rich text field

Click the field to open properties panel on right.

3
Expand Rich Text Editor Control Configuration

Enter web resource name in File location field.

4
Save and publish form

Publish all customisations to apply changes.

When a solution component refers to a web resource like this the configuration is loaded at runtime, the web resources which are just text inside the definition referenced when rendering the control itself. Meaning we must deploy this web resource as is we cannot do this at the moment of the field attribute configuration for any control as it loads at runtime.

💡 Pro Tip

Create separate configuration files for different use cases rather than one universal config. For example: RTEConfig_Marketing.json with brand fonts, RTEConfig_Technical.json with code formatting, RTEConfig_Simple.json with minimal options. Apply appropriate config to each field based on content type. This provides tailored editing experiences without overwhelming users with irrelevant formatting options.

Complete Configuration Example

Production-ready configuration example:

{
  "defaultSupportedProps": {
    "font_names": "Arial/Arial,sans-serif;Calibri/Calibri,sans-serif;Georgia/Georgia,serif;Verdana/Verdana,sans-serif;Corporate Sans/CorporateSans,sans-serif",
    "font_size": "8pt 10pt 12pt 14pt 16pt 18pt 24pt 36pt",
    "font_defaultLabel": "Calibri",
    "fontSize_defaultLabel": "12pt",
    "color_cols": "5",
    "color_rows": "4",
    "color_map": [
      "000000", "Black",
      "FFFFFF", "White",
      "0078D4", "Brand Blue",
      "107C10", "Brand Green",
      "FFB900", "Brand Yellow",
      "E81123", "Brand Red",
      "5C2D91", "Brand Purple",
      "008272", "Brand Teal",
      "767676", "Neutral Grey",
      "D83B01", "Brand Orange"
    ]
  },
  "toolbar": [
    {
      "name": "basicstyles",
      "items": ["Bold", "Italic", "Underline", "Strike"]
    },
    {
      "name": "paragraph",
      "items": ["NumberedList", "BulletedList", "Outdent", "Indent"]
    },
    {
      "name": "styles",
      "items": ["Font", "FontSize"]
    },
    {
      "name": "colors",
      "items": ["TextColor", "BGColor"]
    },
    {
      "name": "links",
      "items": ["Link", "Unlink"]
    },
    {
      "name": "insert",
      "items": ["Table", "HorizontalRule"]
    },
    {
      "name": "clipboard",
      "items": ["Undo", "Redo"]
    }
  ],
  "extraPlugins": "font,colorbutton,justify,table",
  "removePlugins": "iframe,flash,forms,div",
  "removeButtons": "Subscript,Superscript,Anchor,Styles,Format"
}

Configuration sections explained:

  • font_names – Corporate Sans added as custom font with fallback
  • color_map – Brand colour palette with descriptive labels
  • toolbar – Organised into logical groups for better UX
  • removePlugins – Disabled iframe and flash for security
  • removeButtons – Hidden rarely used formatting options

Testing the configuration:

1
Open model-driven app in new browser session

Use incognito/private mode to ensure no caching issues.

2
Navigate to form with customised field

Create new record or edit existing to see rich text editor.

3
Verify custom fonts appear in dropdown

Check that corporate fonts are listed and selectable.

4
Test colour picker shows brand colours

Confirm custom colour palette appears with correct labels.

5
Check toolbar buttons match configuration

Verify removed buttons are hidden, toolbar groups are correct.

⚠️ Custom Font Requirements

Custom fonts (like Corporate Sans in this example) must be available to user browsers for text to render correctly. Options: host font files as web resources and load via CSS, use web-safe fonts with similar appearance as fallbacks, or use Google Fonts or Adobe Fonts if licensing permits. Without font availability, browser falls back to default font, breaking brand consistency.

Common Issues and Solutions

Issue: Configuration not loading, default editor appears

  • Cause: JSON syntax error in configuration file
  • Solution: Validate JSON at jsonlint.com, check for missing commas, extra commas, unmatched brackets
  • Cause: Incorrect web resource reference in field properties
  • Solution: Verify web resource name matches exactly, include publisher prefix
  • Cause: Customisations not published
  • Solution: Publish all customisations, clear browser cache, hard refresh

Issue: Custom fonts not appearing in dropdown

  • Cause: Incorrect font_names syntax
  • Solution: Use format: Display Name/font-family,fallback; separate with semicolons
  • Cause: Font family name misspelled
  • Solution: Check exact font family name, case-sensitive on some browsers

Issue: Colours not showing correctly

  • Cause: color_map format incorrect
  • Solution: Must be array: hex code (6 chars, no hash), label, hex code, label
  • Cause: color_cols and color_rows mismatch
  • Solution: Ensure total colours matches cols × rows calculation

Issue: Toolbar buttons missing or wrong order

  • Cause: Button names case-sensitive or misspelled
  • Solution: Check official CKEditor documentation for correct button names
  • Cause: Required plugin not enabled
  • Solution: Add plugin to extraPlugins before using its buttons

Debugging steps:

1
Check browser console for errors

F12 developer tools, Console tab shows configuration loading errors.

2
Test with minimal configuration first

Start with just one customisation, add more incrementally.

3
Compare against working example

Use Microsoft sample configs as baseline, modify gradually.

4
Verify web resource is in correct solution

Export solution, check web resource is included in package.

Best practices for reliable configurations:

  • Version control configuration files in source control (Git)
  • Document each customisation with comments in separate readme file
  • Test in development environment before deploying to production
  • Create backup copy of working configuration before changes
  • Use solution-aware web resources for proper ALM
💡 Pro Tip

Create a test form with multiple rich text fields, each using different configuration files. This test form becomes your configuration sandbox—quickly compare different configs side-by-side, validate changes before rolling to production forms, and demonstrate options to stakeholders. Update test configs frequently to prototype new requirements without impacting live users.

The Microsoft rich text editor control documentation provides comprehensive information on configuration options, supported properties, and advanced customisation patterns for building sophisticated content editing experiences in model-driven apps.

Article Info
Advanced
For experienced Power Platform developers.
10 min read  ·  March 2026
Prerequisites
Advanced model-driven app customisation experience
Understanding of JSON structure and syntax
Familiarity with model-driven app form editing
Knowledge of web resources in Dataverse solutions

Need this built for your business?

We design and build production-grade Power Platform solutions for FM, Construction and Manufacturing businesses.

Book a Discovery Call →