Introduction
Dataverse is the best data source to use in conjunction with Power Apps, Microsoft heavily invest in the customisation of Dataverse and continuously adding new features which make the integration of Dataverse data source even easier to build Power Apps.
If you are using Model Driven apps you must have your data within Dataverse
Solutions
Before creating a table make sure you created a solution first as these keep everything together in one place and also sets the prefix for the solution objects which is important later down the line when referencing objects in several different places and scenarios.
If your not sure how solutions work please see my other blog post which goes into more details on how to set this up.
Setting Up the Table
To set up the table first head over to https://make.powerapps.com and go your solution, click New > Table > Table (Advanced Properties).
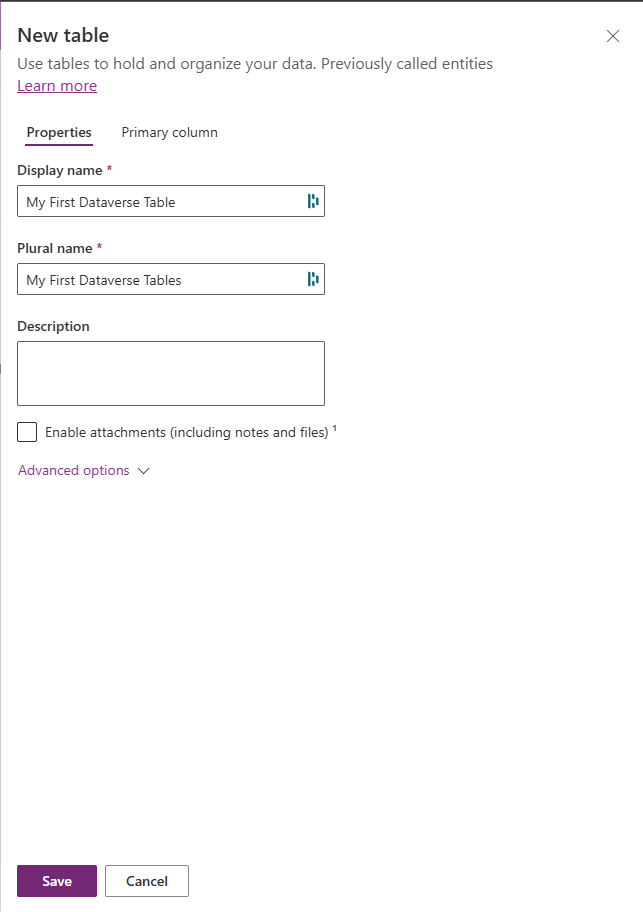
To set up the table first enter a ‘Display Name’ for the table, when entering a display name this will also autogenerate the ‘Plural Name’ and ‘Schema Name’.
On the ‘Primary Column’ tab enter a Display Name (This is referred to in Look-Up’s and cannot be changed or delete later) by default this is set to ‘Name’.
Click ‘Save’ to create the table
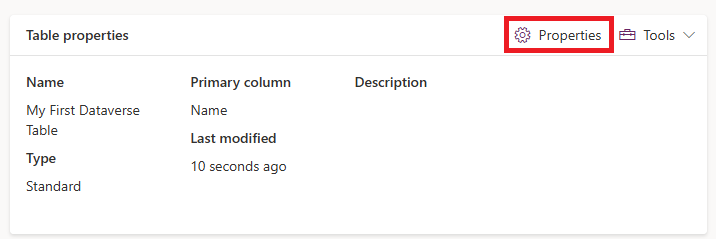
Once the Dataverse table has been created you can go back to edit properties by clicking ‘Properties’ under the ‘Table Properties’ section
| Property | Description |
|---|---|
| Schema name | The schema name is automatically created when adding a new table, this is set from the display name. The schema name can’t be changed once the table has been created. |
| Type | Type of tables has different functions, Standards Table is the most commonly used. Activity tables are a special table that can you can use to create activities against such as email or tasks. Virtual tables require the table be populated with data from an external source such as SharePoint list or SQL. Elastic tables should be considered when your business scenario entails very large amount of data. |
| Record ownership | Switch the table type to Activity table to create tables that can manage tasks. The type of Ownership defines who can perform operations on a record. |
| Choose a table image | Choose an icon to be displayed for the table this is most commonly visible on lookup records and navigation views. |
| Color | Set a colour to be used for the table in model-driven apps. |
| Apply duplicate detection rules | If duplicate detection is enabled for your organization, enabling this allows you to create duplicate detection rules for this table. |
| Track changes | Enables data synchronisation to detect what data has changed since the data was initially extracted or last synchronised. |
| Provide custom help | When selected, set a Help URL to control what page users see when they select the help button in the application. Use this to provide guidance specific to your company processes for the table. |
| Audit changes to its data | When auditing is enabled for your environment, this allows for changes to table records to be captured over time. When you enable auditing for a table, by default, many table columns, such as data types of owner, number, text, and choice are enabled for auditing. However, some columns aren’t enabled by default such as those with data types of lookup, but those columns can be enabled. Select or clear the Enable auditing property for the columns that you want to enable auditing on. |
| Leverage quick create form if available | After you’ve created and published a Quick Create Form for this table, people have the option to create a new record using the Create button in the navigation pane. A pop out form on a model driven app will usually show on the right hand side on the app. |
| Enable long term retention | Dataverse support to securely retain unlimited data long term. |
| Creating a new activity | Associate activities to records for this table. |
| Doing a mail merge | App users can use this table with mail merge. |
| Setting up OneNote integration | When you turn on OneNote integration, you have the benefits of using OneNote to take or review customer notes from within your records. Requires SharePoint document management to be set up. |
| Setting up SharePoint document management | After other tasks have been performed to enable document management for your organization, enabling this feature allows for this table to participate in integration with SharePoint. |
| Can have connections | Use the connections feature to show how records for this table have connections to records of other tables that also have connections enabled. |
| Can have a contact email | Send emails using an email address stored in one of the fields for this table. If a Single Line of Text column with format set to email doesn’t already exist for this table, a new one is created when you enable sending email. |
| Have an access team | Create team templates for this table. |
| Can be linked to feedback | Let app users write feedback for any table record, or rate table records within a defined rating range. More information: Configure a table for feedback/ratings. |
| Appear in search results | Enable so that table records can be included in search results when using an app. |
| Can be taken offline | Makes data in this table available while the Power Apps application isn’t connected to the internet. |
| Can be added to a queue | Use the table with queues. Queues improve routing and sharing of work by making records for this table available in a central place that everyone can access. |
Adding A Column
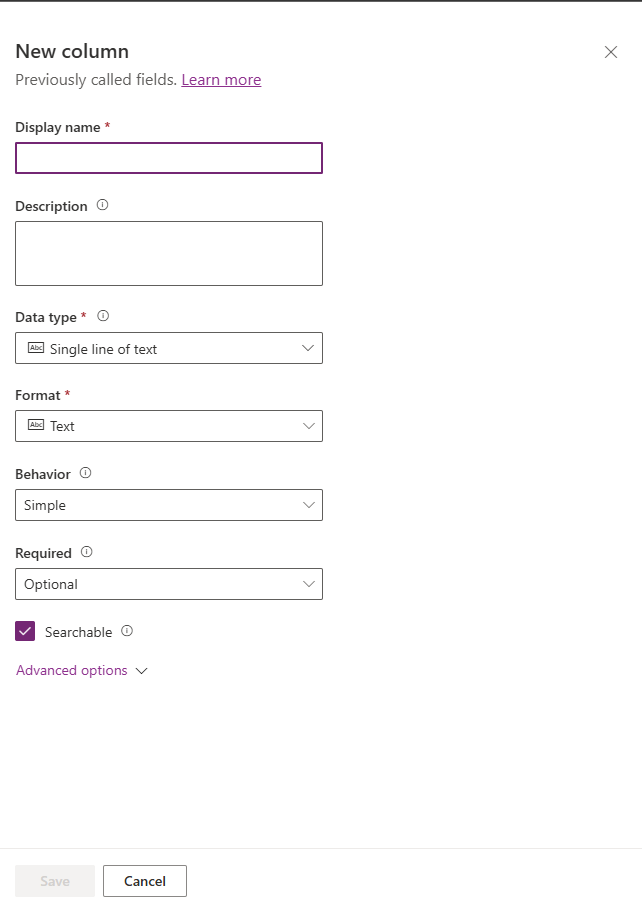
To add a new column to the table can be done in 2 different ways. Go to ‘Columns’ and select ‘New’ or the most common way is to click ‘+’ on the right hand-side from the table overview.
A popup as the image below will appear, you will need to give your column a name and select the ‘Data Type’ and ‘Format’
Once column has been created you can some settings cannot be changed and if you pick the wrong data type in most cases the column will need to be recreated.
- Column Types
- Text
- Number
- Date and Time
- Lookup
- Choice
- Currency
- Autonumber
- File
- Formula
| Type | Description |
|---|---|
| Text | Single line text is set to default of 100 characters however this can be extended to a maximum value of 4000 characters. Anything longer than 4000 characters Multiline Text type should be used. Multiline text is set to 2000 by default but can be increased up to the length of 1,048,576. If formatting text with HTML and using bullet points etc Rich Text should be used. Email/ Phone Number and URL gives you better control within model driven app by providing automatic validation on the field. |
| Number | Number data type should be used for any data types that requires number only for example quantity or a calculation where formula column doesn’t fit your needs. A normal number can be in range from -2147483648 to 2147483647. This can also be increased by setting the ‘Size of number’ property to ‘Big’ this gives a range from -9,223,372,036,854,775,808 to 9,223,372,036,854,775,807. When selecting ‘Big’ the minimum and maximum values cannot be changes |
| Date and Time | Data type used for tracking Date or Time for example a Birthday or completion Date. Model Driven app and Canvas Apps both have a Date/ Time picker tool out of the box to ensure field is formatted correctly. |
| Lookup | One of the most crucial fields when your dealing with large amount of data, Lookup’s can be a bit daunting but have high flexibility to combine and access data from multiple tables within the same environment (These usually use a 1 to Many or Many to Many relationship). Also a good alternative when choice fields are too restrictive |
| Choice | Allow Yes/ No value and single or multiple selections, Choice type gives the user to create a local choice type or a global choice that can be used across multiple tables whilst keeping the same values. Where as Yes/No fields give better restrictions to for toggle and selection |
| Currency | A better data type to use when dealing with currency. Currency field allows for cross country conversions. Selecting this type actually creates two columns in the database one standard currency column and another ‘(base)’ used for conversion rates |
| Autonumber | Although dataverse comes with an out the box ID (GUID) to identify records autonumber is very useful especically when dealing with refrences |
| File | File column can be used to store files and images. Although Dataverse is not a document storage you can add a file to a column, however Datavese only supports adding 1 file per column for multiple files you would either need a file database with a 1 to many relationship or use SharePoint Document Integration |
| Formula | One of the most under used Column Types is Formula, due to this being on a table level the formula can automatically run even if data is already present in the Database. The formula columns can even do Look-Up’s to related tables however these are restricted to one table and doesn’t work with Customer or Polymorphic look-up’s. |
Column Types
Some of the data types that can be created are:- Text
- Number
- Date and Time
- Lookup
- Choice
- Currency
- Autonumber
- File
- Formula
| Type | Description |
|---|---|
| Text | Single line text is set to default of 100 characters however this can be extended to a maximum value of 4000 characters. Anything longer than 4000 characters Multiline Text type should be used. Multiline text is set to 2000 by default but can be increased up to the length of 1,048,576. If formatting text with HTML and using bullet points etc Rich Text should be used. Email/ Phone Number and URL gives you better control within model driven app by providing automatic validation on the field. |
| Number | Number data type should be used for any data types that requires number only for example quantity or a calculation where formula column doesn’t fit your needs. A normal number can be in range from -2147483648 to 2147483647. This can also be increased by setting the ‘Size of number’ property to ‘Big’ this gives a range from -9,223,372,036,854,775,808 to 9,223,372,036,854,775,807. When selecting ‘Big’ the minimum and maximum values cannot be changes |
| Date and Time | Data type used for tracking Date or Time for example a Birthday or completion Date. Model Driven app and Canvas Apps both have a Date/ Time picker tool out of the box to ensure field is formatted correctly. |
| Lookup | One of the most crucial fields when your dealing with large amount of data, Lookup’s can be a bit daunting but have high flexibility to combine and access data from multiple tables within the same environment (These usually use a 1 to Many or Many to Many relationship). Also a good alternative when choice fields are too restrictive |
| Choice | Allow Yes/ No value and single or multiple selections, Choice type gives the user to create a local choice type or a global choice that can be used across multiple tables whilst keeping the same values. Where as Yes/No fields give better restrictions to for toggle and selection |
| Currency | A better data type to use when dealing with currency. Currency field allows for cross country conversions. Selecting this type actually creates two columns in the database one standard currency column and another ‘(base)’ used for conversion rates |
| Autonumber | Although dataverse comes with an out the box ID (GUID) to identify records autonumber is very useful especically when dealing with refrences |
| File | File column can be used to store files and images. Although Dataverse is not a document storage you can add a file to a column, however Datavese only supports adding 1 file per column for multiple files you would either need a file database with a 1 to many relationship or use SharePoint Document Integration |
| Formula | One of the most under used Column Types is Formula, due to this being on a table level the formula can automatically run even if data is already present in the Database. The formula columns can even do Look-Up’s to related tables however these are restricted to one table and doesn’t work with Customer or Polymorphic look-up’s. |
Editing a View
Views are a filtered set of data from a Dataverse table, views are useful not just in Model Driven Apps but also can also be used within Canvas Apps to reduce load times to only get you need.
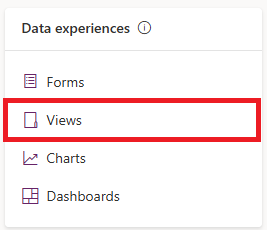
To Create a View go to ‘Views’ from the ‘Data experiences’ section on the table
When you first load up views there will be several different types to choose from these can include:
Active View
By default displays records that are in active state set by Dataverse ‘Status’ column.
Use Case: Typically used to show records that are currently in use or relevant, such as active accounts, contacts, or opportunities. Found in: Table views within the Dataverse.
Inactive
Definition: Displays records that are no longer active set by the status column in Dataverse.
Use Case: Used to show records that are no longer in use or relevant, such as inactive accounts, contacts, or opportunities.
Advanced Find View
Allows users to create complex queries to find specific records based on multiple criteria.
Use Case: Used for creating custom views and reports by filtering records based on specific conditions on a form.
Associated View
Displays related records when viewing a parent record.
Use Case: Used to show related records, such as activities related to an account or contacts related to an opportunity.
Lookup View
Displays records that can be selected in a lookup field.
Use Case: Used to find and select records when setting lookup fields in forms.
Quick Find View
Provides a quick search functionality to find records based on specific criteria.
Use Case: Used for quickly searching records within an entity using predefined search fields.
When you go into Active View you will see the below screen.
Some views may look different and are still using the classic experience
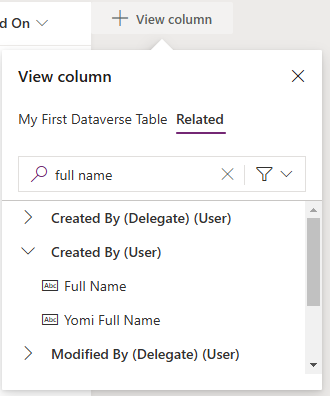
You can add related fields on Columns and filters by selecting the ‘Related’ tab and finding the field from the look up column. For example if you want to see the ‘Full Name’ of user that created the record you can add these to the view.
Once all columns have been added to the form click ‘Save and Publish’ for changes to take effect.