Create Power Automate Flow From Template
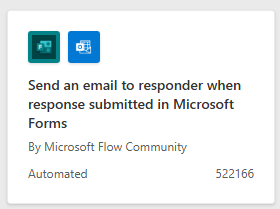
When you first load up an automation from a template you may be asked to sign in. This will create a connection within Power Automate for the logged in user. The logged in user account that runs the automation will need to be granted access to all resources/ permissions for the connection they are using. For example you can’t send an email from another users account unless you have send as delegated permissions assigned to the user
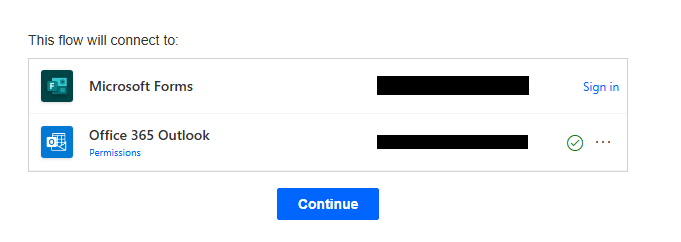
Once you click continue you will be directed to the Power Automate Designer, by default the new designer will load up, however this is still under development so you may find some features don’t work as expected, to switch to the classic designer toggle ‘New Designer’ in the top right corner.
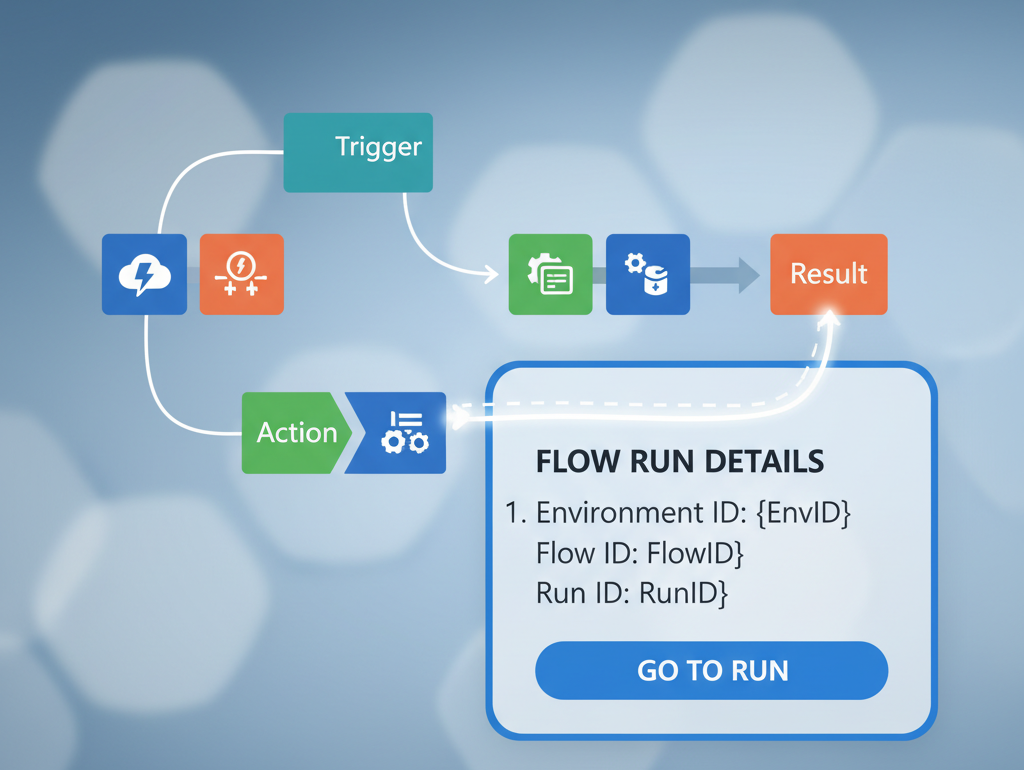
In Power Automate each step either has:
- Trigger – This is the first step that starts the automation e.g. ‘When a file is created’
- Action – This is each step after the trigger, so once the trigger has been initialised each action is the step that happens next throughout the automation/ workflow
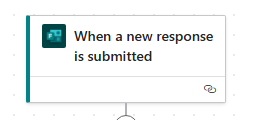
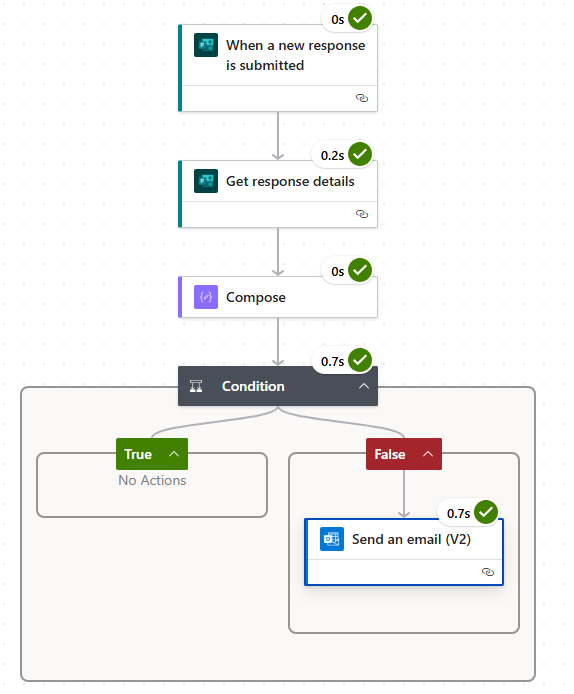
The first thing you will notice when you load up the automation is a warnings on the Microsoft form trigger and the Microsoft Form action, this is because these steps are missing information required to run the automation. Clicking on each of these will tell us what we need to fix to proceed.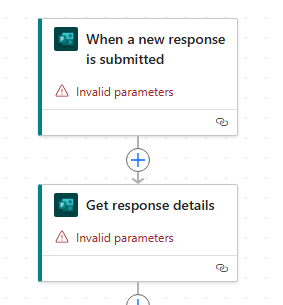
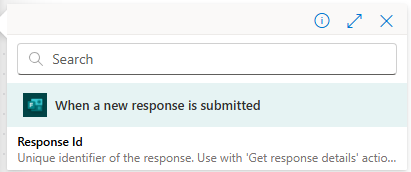
On the trigger we get the error ‘Form Id’ is required. As this is the trigger we need to define which form the automation will run from, this is so the automation only runs when an response as been submitted from one particular form. If we select a form you will notice the error will disappear
If we click the action ‘Get response details’ we will also need to select the form in which we want to get the responses from, this allows us to get the details from the response. You may also notice that this action needs two parameters, in this action the ‘Form Id’ and the ‘Response Id’ this action needs both of these values to continue. The ‘Form Id’ is going to give the automation the form to get the information from and the ‘Response Id’ is going to give us the unique response for that form that was submitted.
The next action on the automation is a condition. In this case the template is checking if they user is anonymous, if the user is anonymous then the email will not be sent, if the user is from within the tenant the user will not be anonymous and the email will be sent.
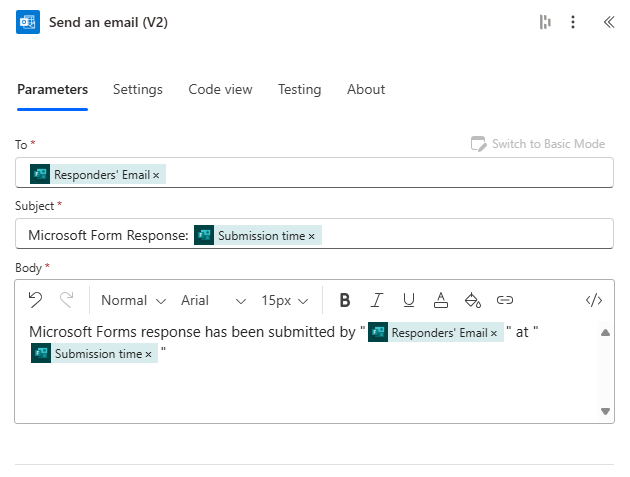
The final action within this template is ‘Send an email (V2)’ this action as long as the previous condition is met will send an email to the responder with a custom message. You may notice the Microsoft Forms logos on different parts of the email.
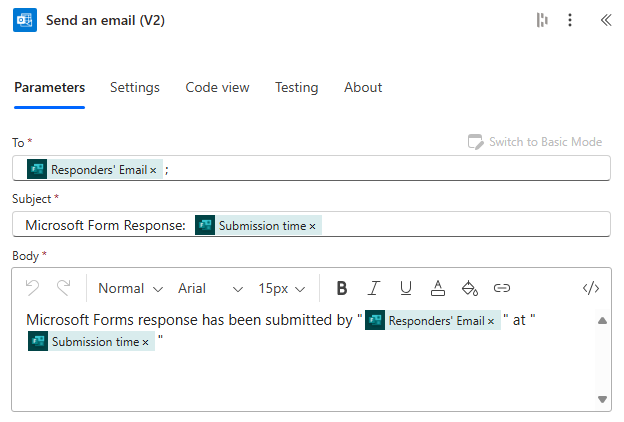
These are Dynamic Content grabbed from a previous step. In this scenario we are getting details from the ‘Get response details’ hovering over one of these will show you where the content is being retrieved from.

The second part is the content within the action were retrieving the dynamic data from. In the above example we are getting the responders email which was recorded when the user submitted the form.
Create Power Automate Flow From Blank
To create a Power Automate flow from blank click ‘Create’ or and select ‘Automated Cloud Flow’. For this example we are going replicate the template example above showing how to use the dynamic content from the Form to Send an email to responder.
When you select ‘Automated Cloud Flow’ a pop up will appear, we can enter the flow name and select the trigger here, for my example I will select skip so I can show the steps all within the designer.
When you load the designer you will see it’s completely blank apart from ‘Add a Trigger’. Select ‘Add a trigger’ and a pop up on the left hand side will appear in the search we will look for ‘forms’ and below you will see all the trigger options that Microsoft Forms connector have built in
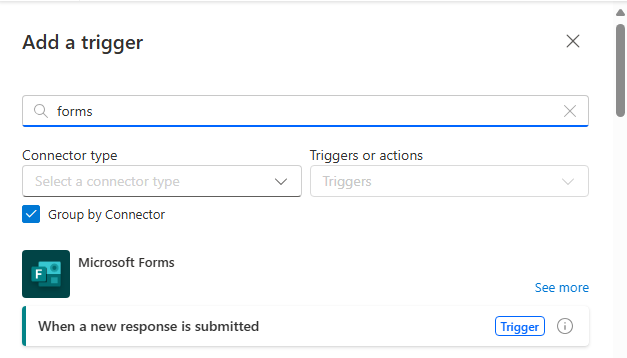
Once we have selected the trigger, we will then be prompted to pick a form just like in the template for the previous example.
Next if we select the ‘+’ icon and type in ‘Forms’ again we can see all the Microsoft Forms actions, for this connector there is only 1 action we can select from
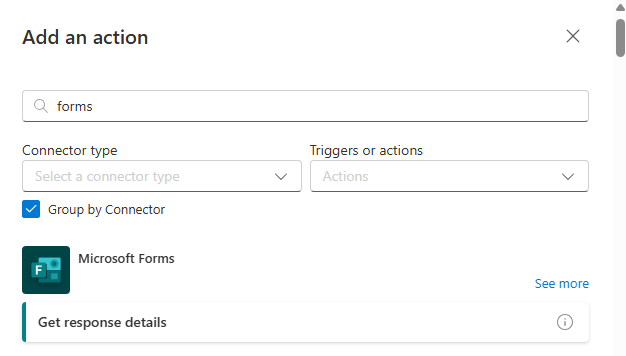
Once selected just like in the previous example select the form from ‘Form Id’.
For response Id we need to get the dynamic content unless we only ever want to grab 1 particular response. Select the lightening bolt icon, this will show us all the dynamic content that can be used from the previous connectors. Select ‘Response Id’ this will come from the connector ‘When a new response is submitted’
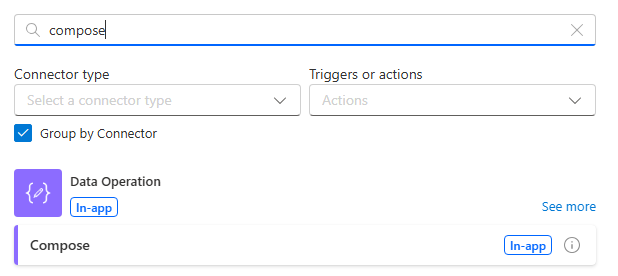
Now before we add the condition I am going to add a ‘Compose’ action. Compose is probably the most used action within Power Automate, Compose lets us see the output of data without initialising variables so we can see the dynamic content when the flow runs.
Remember: The more actions you have on your flow the longer it will take for the flow to run
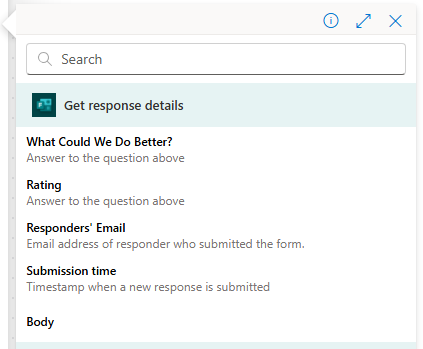
If we add a compose and click in the input and and select the dynamic content, we can now see all the actions we can get from the ‘Get response details’ action this includes Responders email, submission time, and the question answers from a form.
You will also see an option for ‘Body’, Body is used to grab all the data from the previous action in a JSON format, from here we can see all the data and is not restricted to one piece of data, this is useful when troubleshooting, especially when it comes to more complex flows using Dataverse or SharePoint Lists. For this example I will select body which will help us with the next step
Now we only want to send an email to if the responder is within the organisation, there is nothing in dynamics content that can do this so we are going to do a test run to see if there is some data we can find which distinguishes between users inside and outside the organisation. My first test will be to fill out the form using my M365 account, the next run will be within a private browser not logged into any account so I can see the difference in data.
Once we have filled out the form click the back button will now show the 2 flow runs: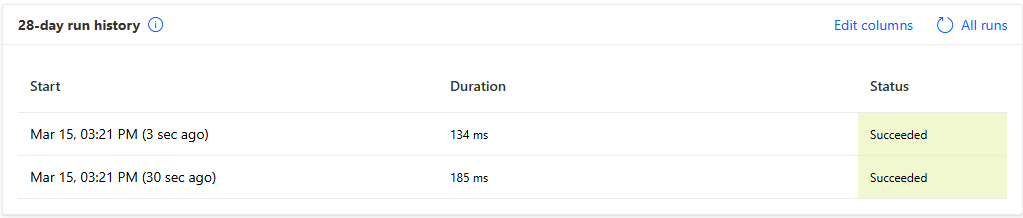
If we select one of the runs and then click on the compose action we will be able to see the response that was returned.
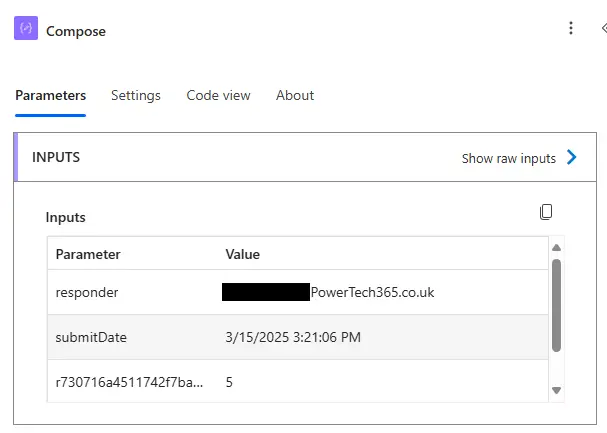
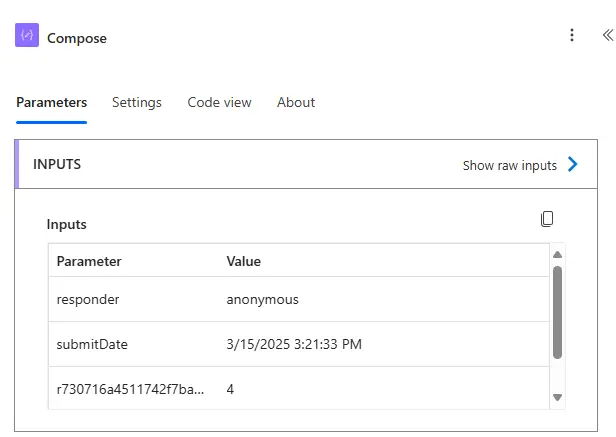
As you can see on the ‘Responder’ one has the email of the responder and the other has the text ‘anonymous’ so we can use this to determine whether the responder is inside or outside of the organisation.
Since the responder grabs the email address of the responder there are a couple of ways we can do this:
- Responder = ‘anonymous’
- Responder does not contain ‘@’
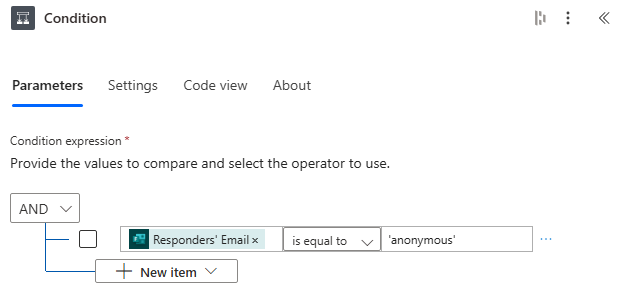
In this condition we need to pass three parts of information
- The first value to compare
- The operator
- the second value to compare
In the first value we can search for dynamic content and look for ‘Responder’ or in this case ‘Responder’s Email’, on the operator we want to select ‘Is equal to’ and the second value to compare we can input a text value of ‘anonymous’
Under condition we now have a True or False option to choose from. We don’t want to email to go to ‘anonymous’ users, also if we left the flow without this condition and we let the email go to users where the email was ‘anonymous’, the flow would fail because it wouldn’t meet the correct formatting for an email address.
Not if we add a final action under ‘False’ for ‘Send an email (V2)’ , on the ‘Send an email (V2)’ there are 3 required parameters that need to be filled out, Email, Subject and Body. We can now use the the dynamic content to enter the responders email from dynamic content, subject of the email and a message.
Your flow should now look like below:

Testing The Flow
We can Test this, as we have already run a test, we have 2 options, we can rerun the flow from a previous run, or we can submit a new response. We will run this from a previous run to save filling out the form again. Select ‘Test’ in the upper right corner, ‘Automatically’ > ‘With a recently used trigger’ > select one the previous runs and click ‘Test’
If successful the user that submitted the form will now receive an email and the run has been successful.
Adding Optional Extra’s
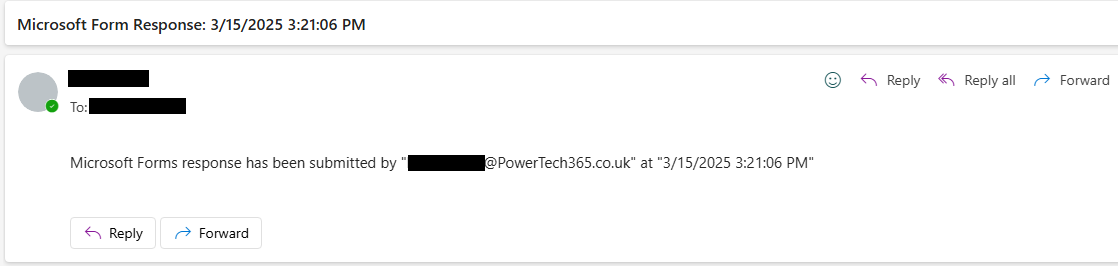
The flow should have run successfully and the responder should have got an email. However in the email below, it doesn’t really tell us much. What if I wanted to receive the responses for the flow runs rather than the responder. You may also notice the time and date is US format but what if I wanted UK format
So instead I will change the ‘To’ in the email from dynamic content to go to my email address.
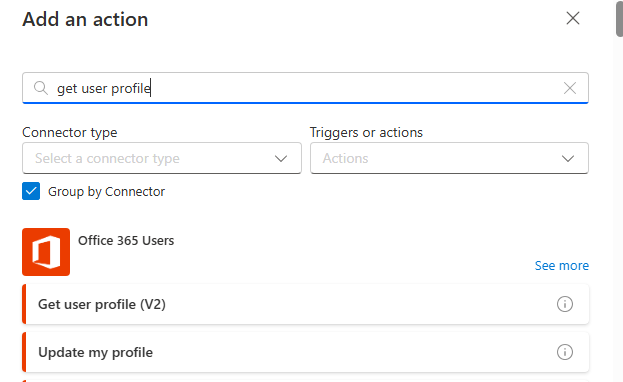
Get User Details From Email Address
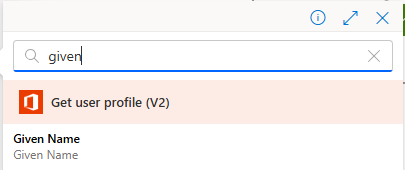
First I want the first name of the person that responded. I can see the flow returned the email address of the responder so I can use the action ‘Get User profile’ within this action it asks for ‘User (UPN)’, this connector connects to Office 365 which stores information about the user within the tennant, for this I can pass in the email address of the responder.
Now within the email I can return the ‘Given Name’ of the user.
Change Submission Date Time Format Using Expression
One of the most useful features in power automats is expressions, expressions allows you to do all sorts of things from if statements, format data and even leverage connectors and return different values. In this example we are going to use a simple expression to change the date and Time of the date. Instead of the date Time reading “3/15/2025 3:21:06 PM” we will change this to read “15/035/2025 15:21”.
Inside the email we have the dynamic content we can delete this and instead of adding dynamic content we can add a formula by selecting the ‘FX’ option this will pop out a formula box. To start with enter ‘formatDateTime’ then select ‘Dynamic Content’ and find the ‘submission time’ after the submission time enter the format you want the date time to appear in. The formula should be in the format:
formatDateTime ‘(‘ {Dynamic Content} ‘,’ {DateTimeFormat}, ‘)’ as shown below