In many business scenarios, data starts in Excel—especially when onboarding new clients or migrating legacy systems. But Excel lacks native relational capabilities like those found in Dataverse or SQL. This blog post walks you through how to:
- Structure two related tables in Excel (e.g., Customers and Orders).
- Upload them to OneDrive or SharePoint.
- Use Power Automate to read the data and create relationships in Dataverse or another system.
Step 1: Prepare Your Excel Tables
Let’s say you have two tables:
Customers Table
| CustomerID | Name | |
|---|---|---|
| C001 | Alice Smith | alice@example.com |
| C002 | Bob Jones | bob@example.com |
Orders Table
| OrderID | CustomerID | Product | Quantity |
|---|---|---|---|
| O1001 | C001 | Laptop | 1 |
| O1002 | C002 | Mouse | 2 |
Step 2: Upload to OneDrive or SharePoint
Save your Excel file to a cloud location accessible by Power Automate:
- OneDrive for Business
- SharePoint Document Library
Step 3: Build the Power Automate Flow
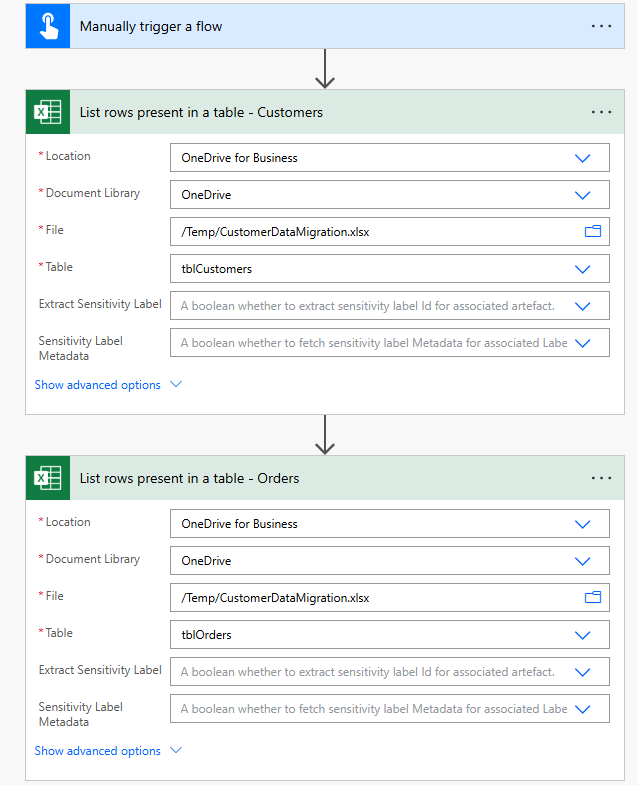
Use “Manually trigger a flow” or “When a file is created” in OneDrive/SharePoint.
Use the “List rows present in a table” action twice:
- First for
tblCustomers - Then for
tblOrders
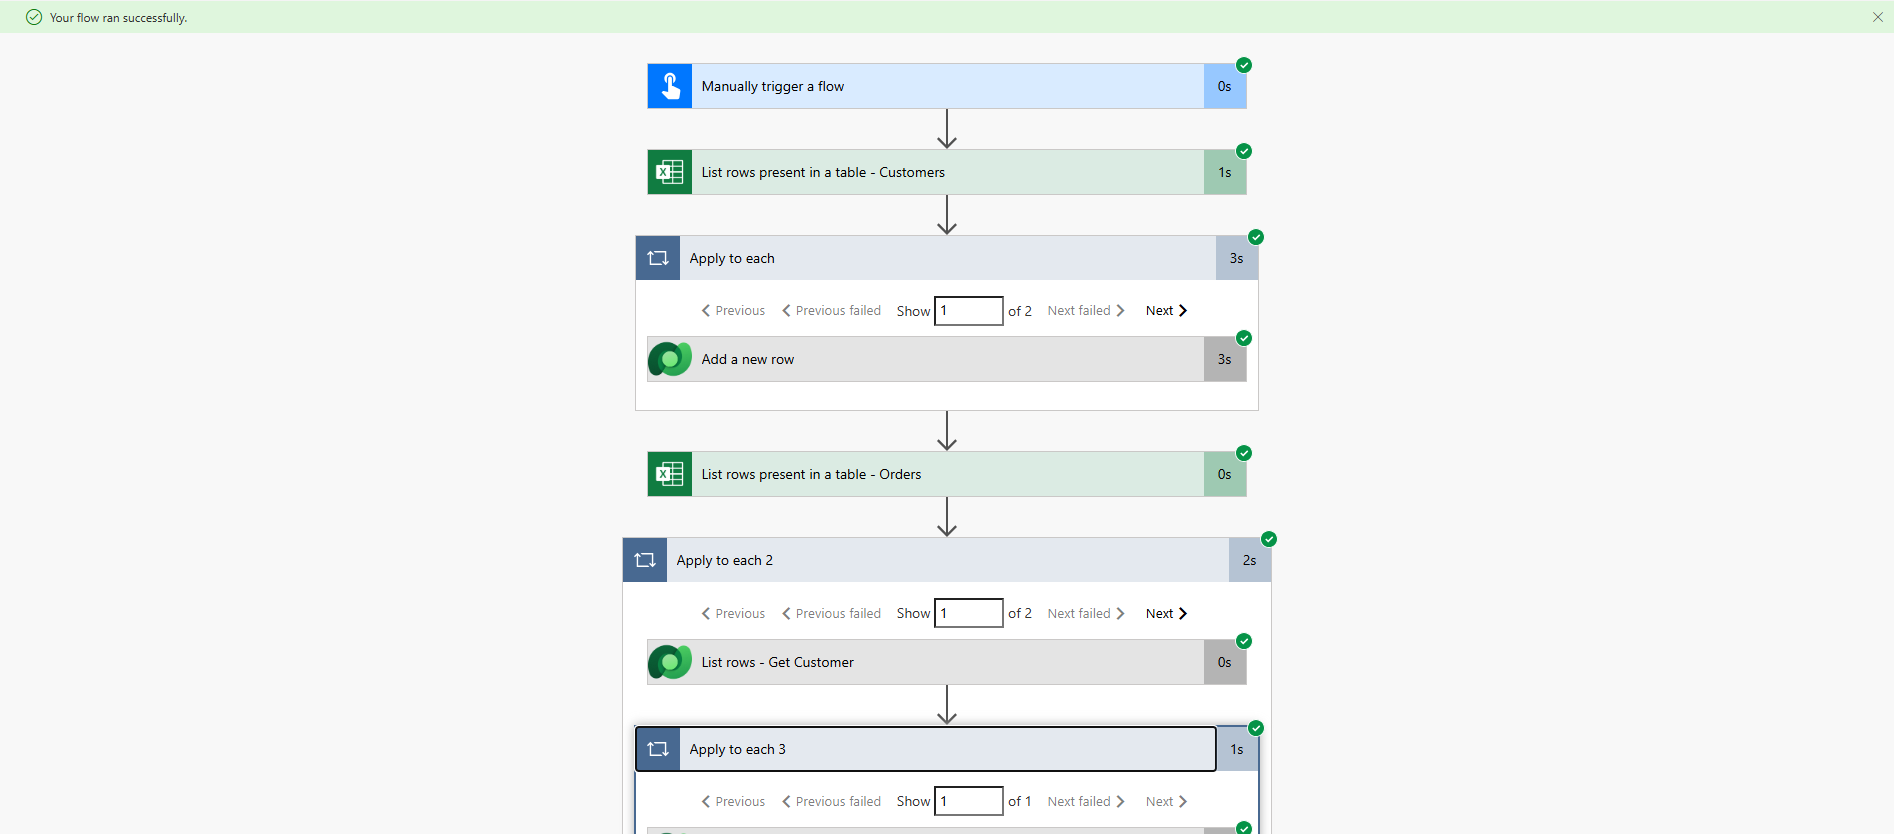
Create record for the child records, in this case the order looks up to the customer, so create the customer table first.
Once you add the dynamic content this will create an ‘Apply to each’ loop to add each record to the dataverse table.
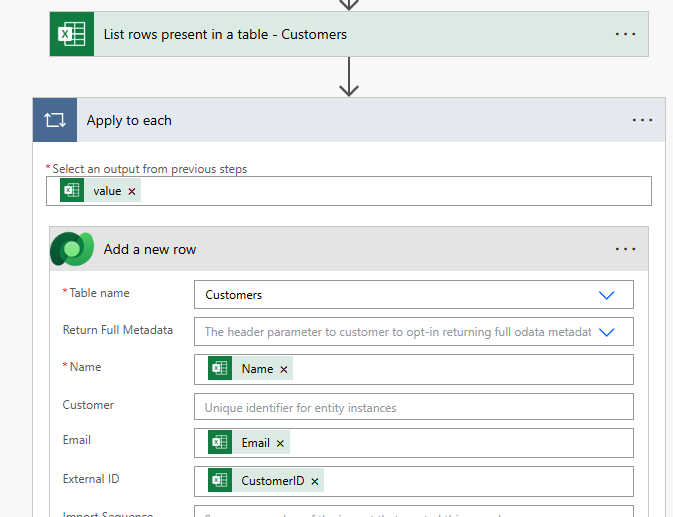
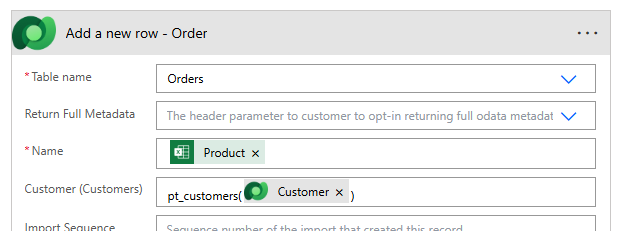
Next we need add a new row with the information from the orders
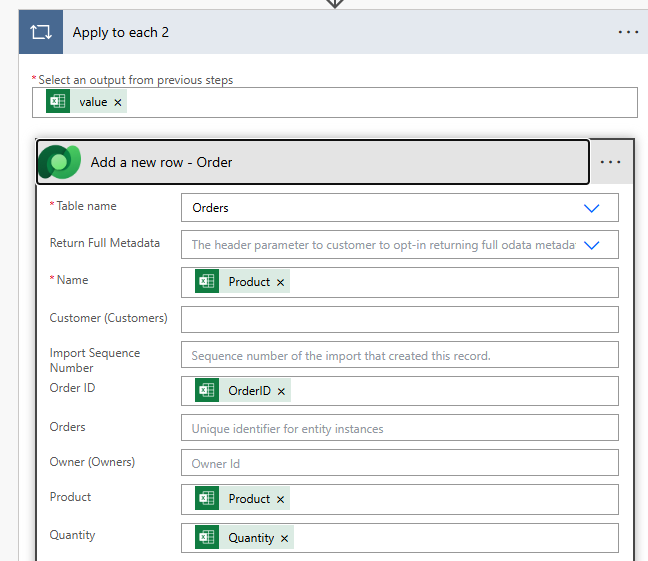
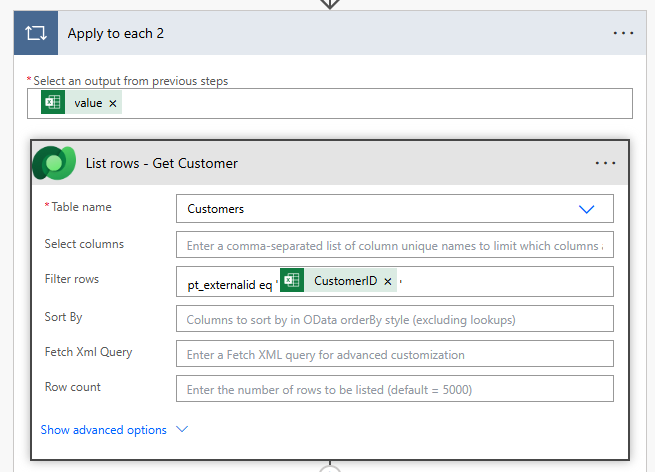
Dataverse uses a GUID to create the relationship. So to get the GUID of the created customer record we now need to do a lookup to find the record. We can do this using ‘List Rows’
We need to get the logical name from the table column so where the customer id, in this case the external ID matches the same as the Customer ID in the excel customer table
Now back in the ‘Add New Row’ for orders we can now add the relationship to the customer. Because we did a list rows and this could potentially be multiple records Power Automate will put the ‘Add New Row’ into an apply to each to loop through.
Select the unique identifier from the customer ‘List Rows’ record
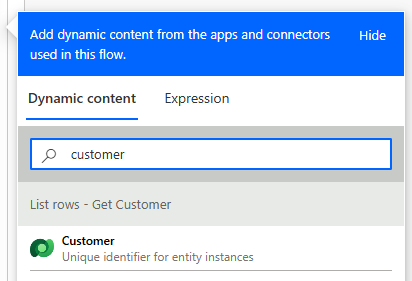
Now on the ‘Add New Row’ for orders we just need to pass in the unique identifier for the customer using the logical name
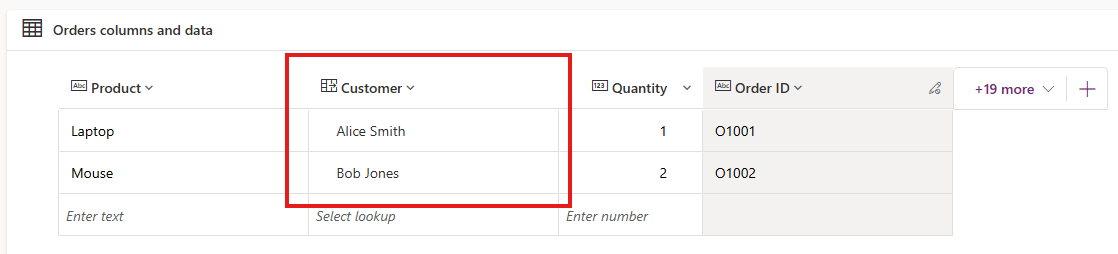
Final Result
Once the flow runs, you’ll see that the Customer lookup field is populated in the Orders table in Dataverse, establishing the relationship between the two records.